使用springboot開發(fā)的第一個web入門程序的實現(xiàn)
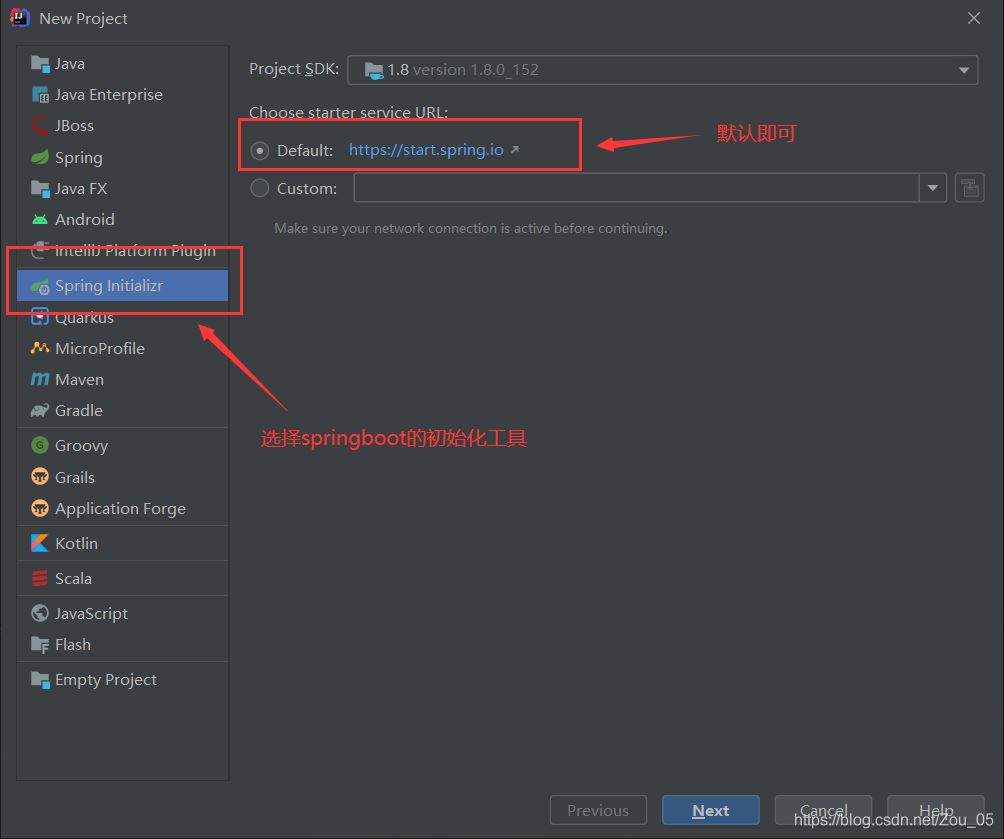
1.新建一個springboot初始化項目
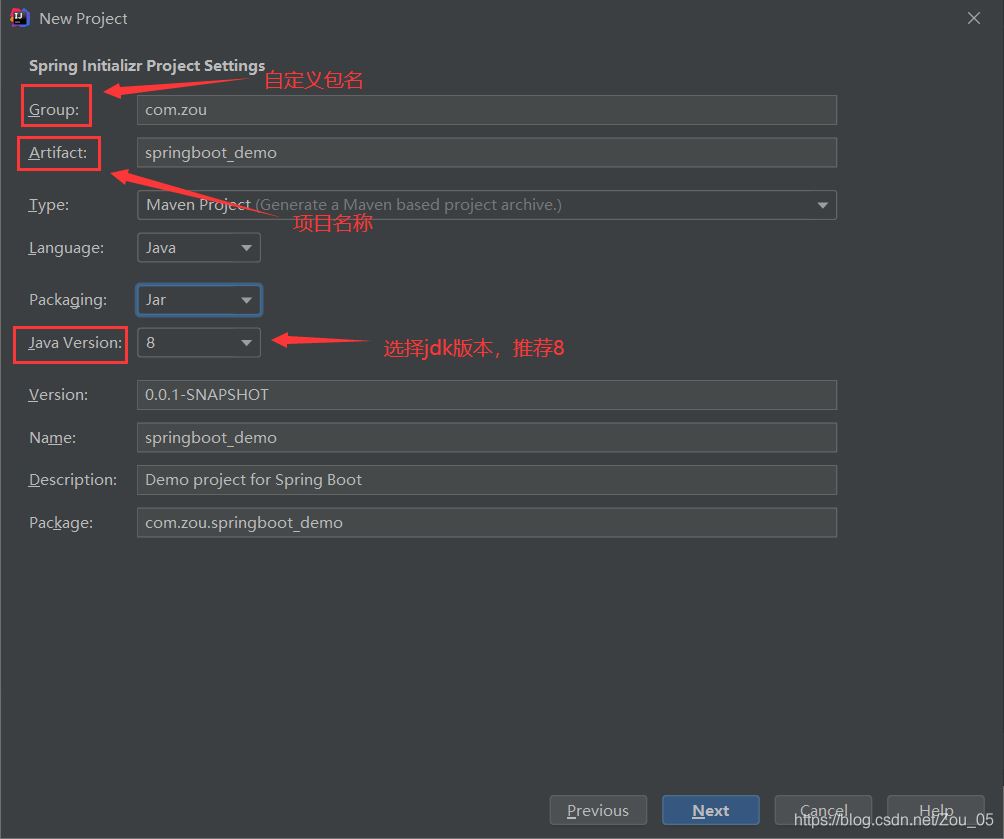
2.輸入自己的包名,項目名及jdk版本,再點擊Next
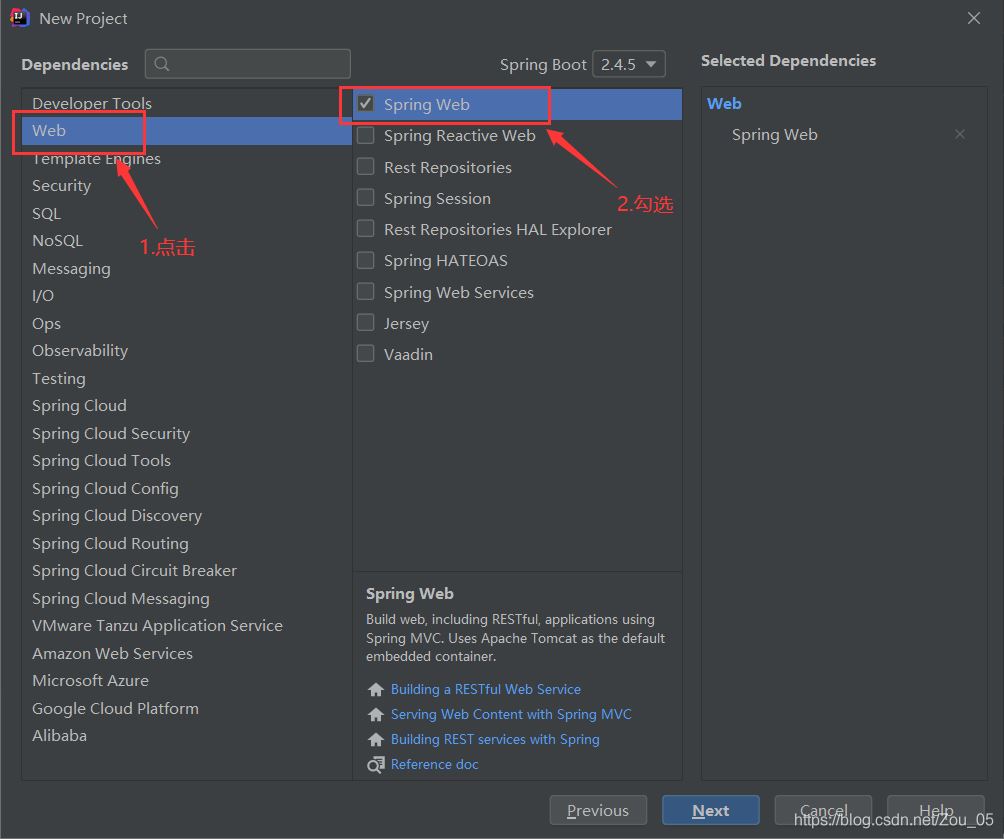
3.勾選Spring Web,再點擊Next
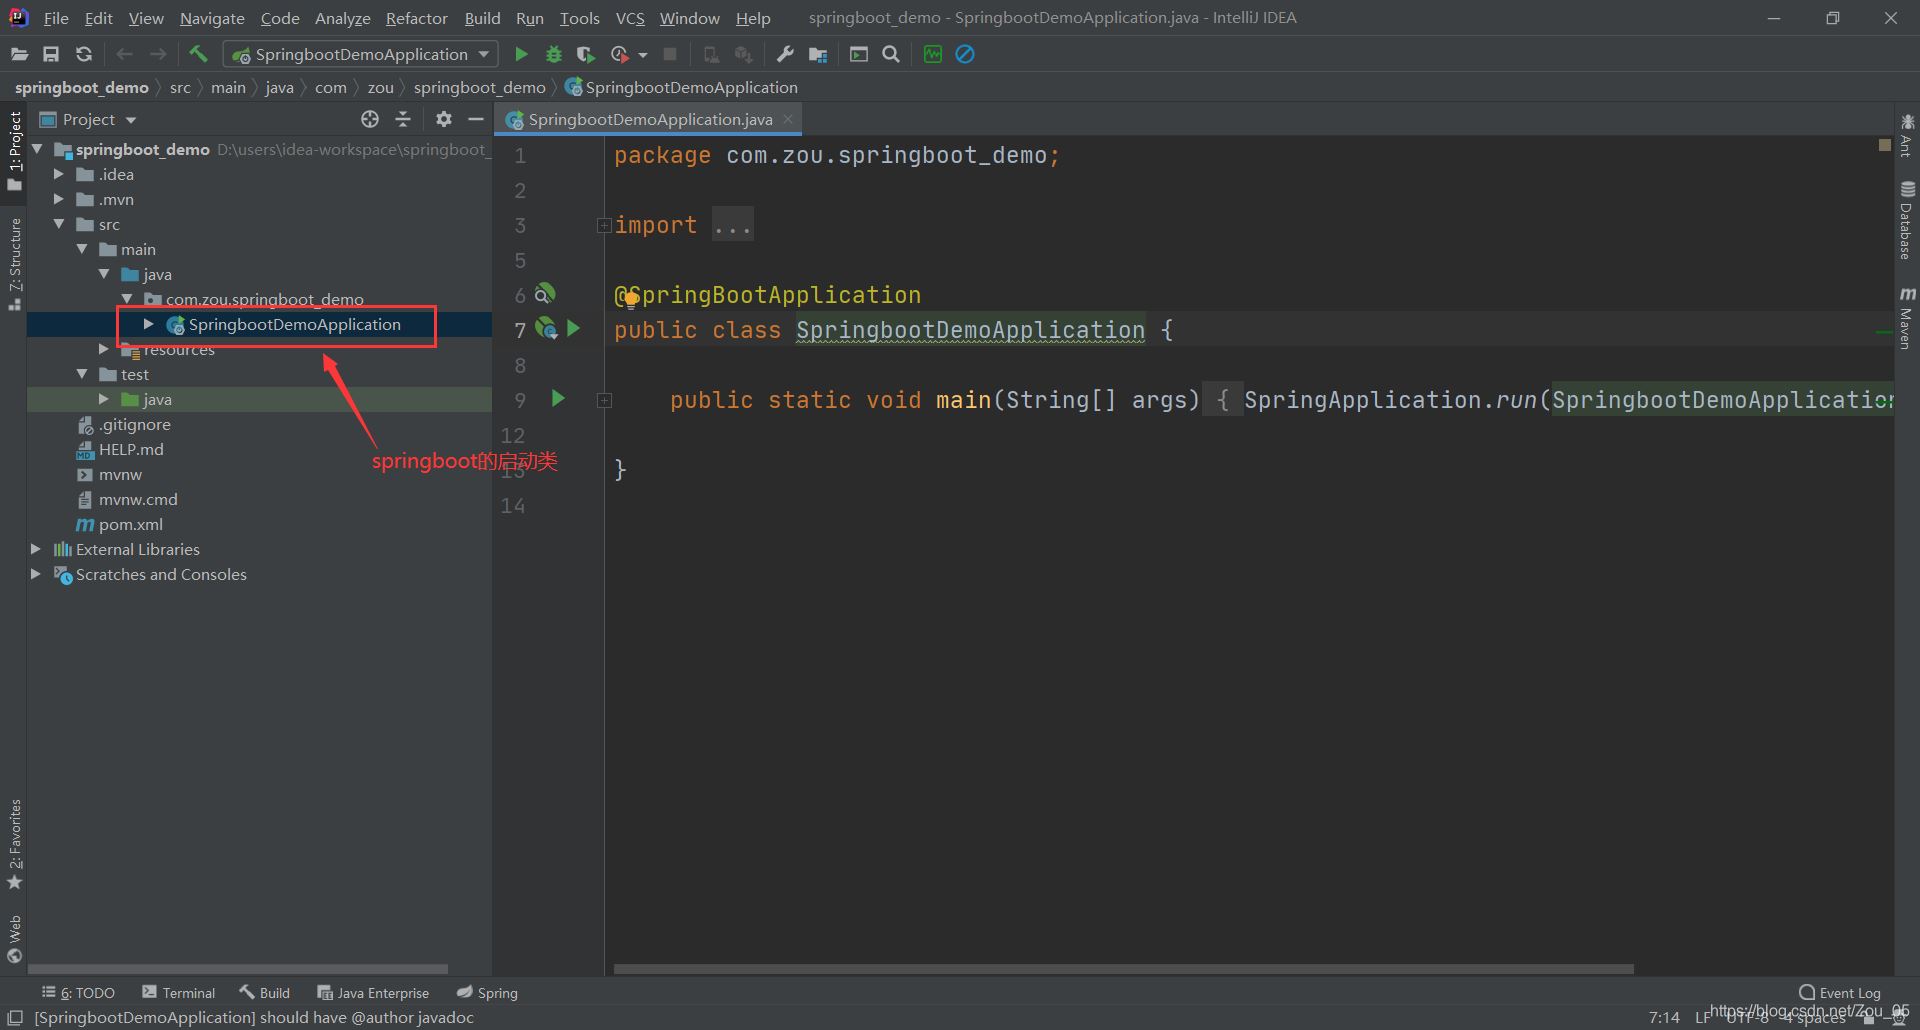
4.再點擊Next,再Finish 默認的項目結(jié)構(gòu)如下圖
(1)修改pom.xml文件
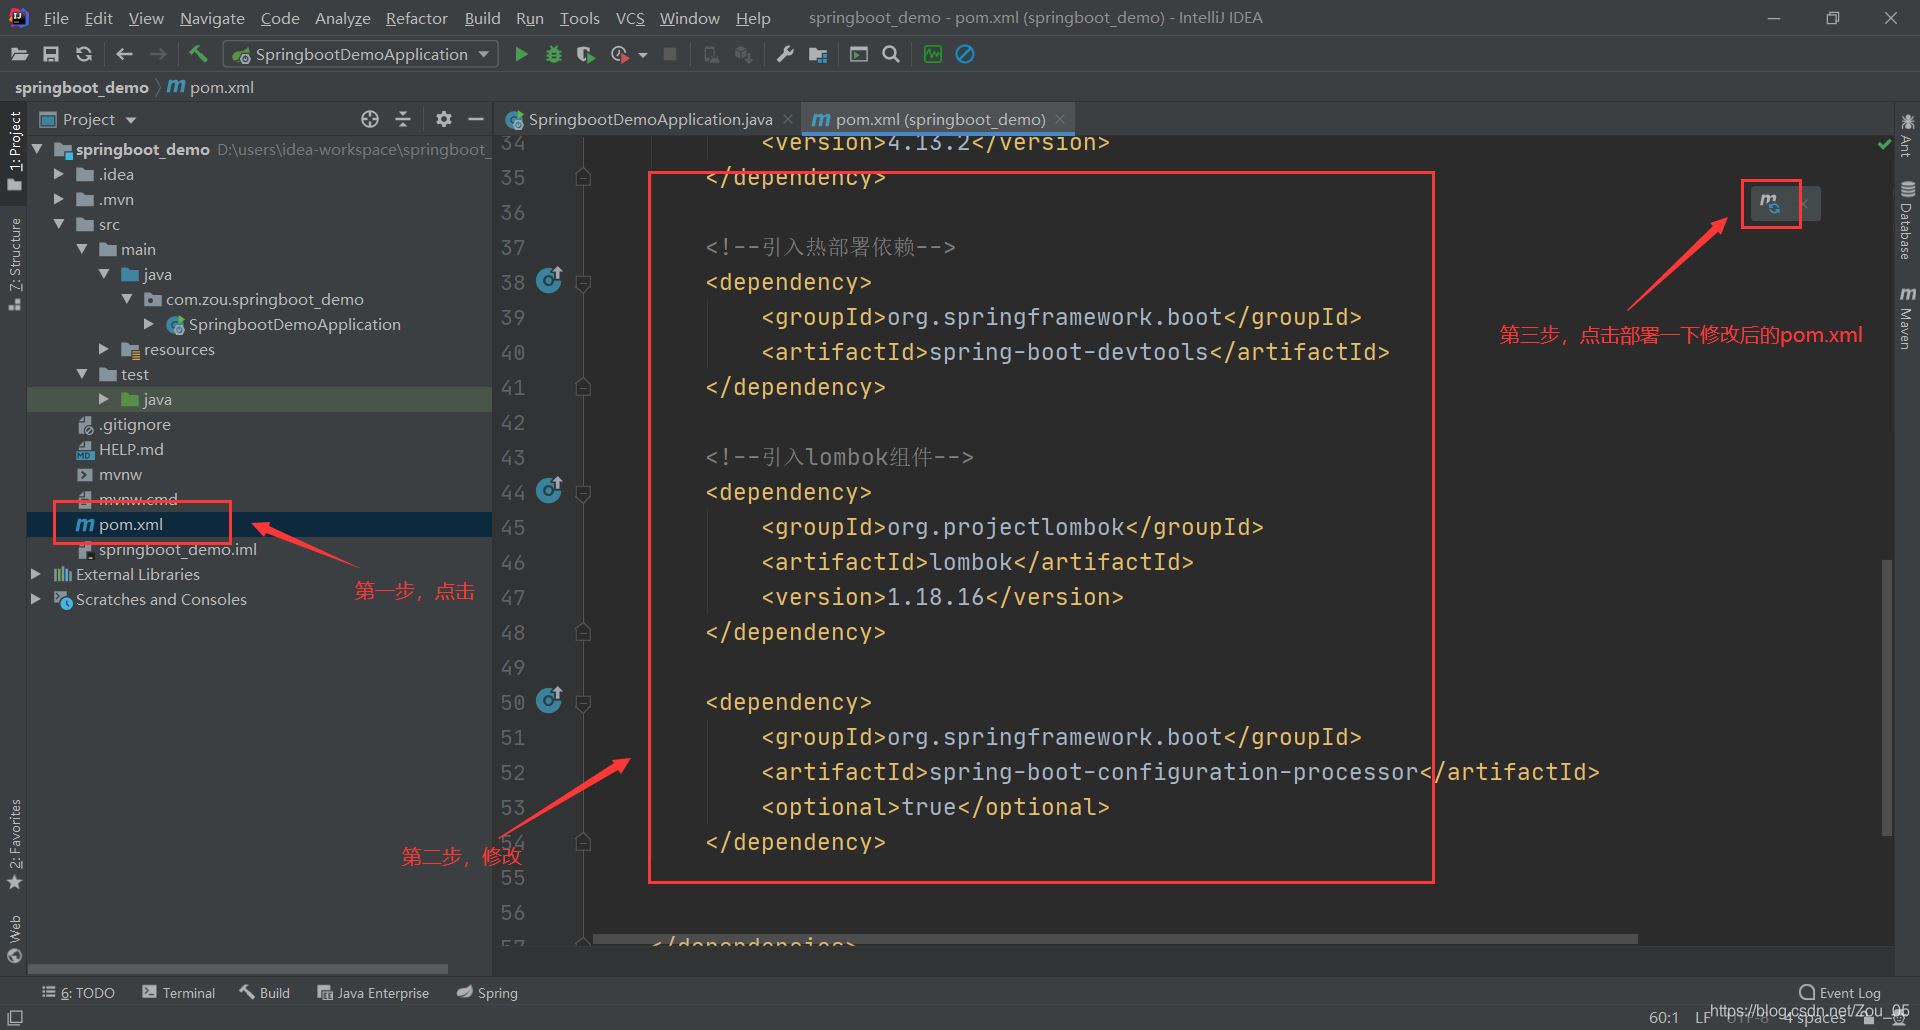
完整的pom.xml為:
<?xml version='1.0' encoding='UTF-8'?><project xmlns='http://maven.apache.org/POM/4.0.0' xmlns:xsi='http://www.w3.org/2001/XMLSchema-instance' xsi:schemaLocation='http://maven.apache.org/POM/4.0.0 https://maven.apache.org/xsd/maven-4.0.0.xsd'> <modelVersion>4.0.0</modelVersion> <parent><groupId>org.springframework.boot</groupId><artifactId>spring-boot-starter-parent</artifactId><version>2.4.5</version><relativePath/> <!-- lookup parent from repository --> </parent> <groupId>com.zou</groupId> <artifactId>springboot_demo</artifactId> <version>0.0.1-SNAPSHOT</version> <name>springboot_demo</name> <description>Demo project for Spring Boot</description> <properties><java.version>1.8</java.version> </properties> <dependencies><dependency> <groupId>org.springframework.boot</groupId> <artifactId>spring-boot-starter-web</artifactId></dependency><dependency> <groupId>org.springframework.boot</groupId> <artifactId>spring-boot-starter-test</artifactId> <scope>test</scope></dependency><dependency> <groupId>junit</groupId> <artifactId>junit</artifactId> <version>4.13.2</version></dependency><!--引入熱部署依賴--><dependency> <groupId>org.springframework.boot</groupId> <artifactId>spring-boot-devtools</artifactId></dependency><!--引入lombok組件--><dependency> <groupId>org.projectlombok</groupId> <artifactId>lombok</artifactId> <version>1.18.16</version></dependency><dependency> <groupId>org.springframework.boot</groupId> <artifactId>spring-boot-configuration-processor</artifactId> <optional>true</optional></dependency> </dependencies></project>
(2)新建一個ControllerDemo類
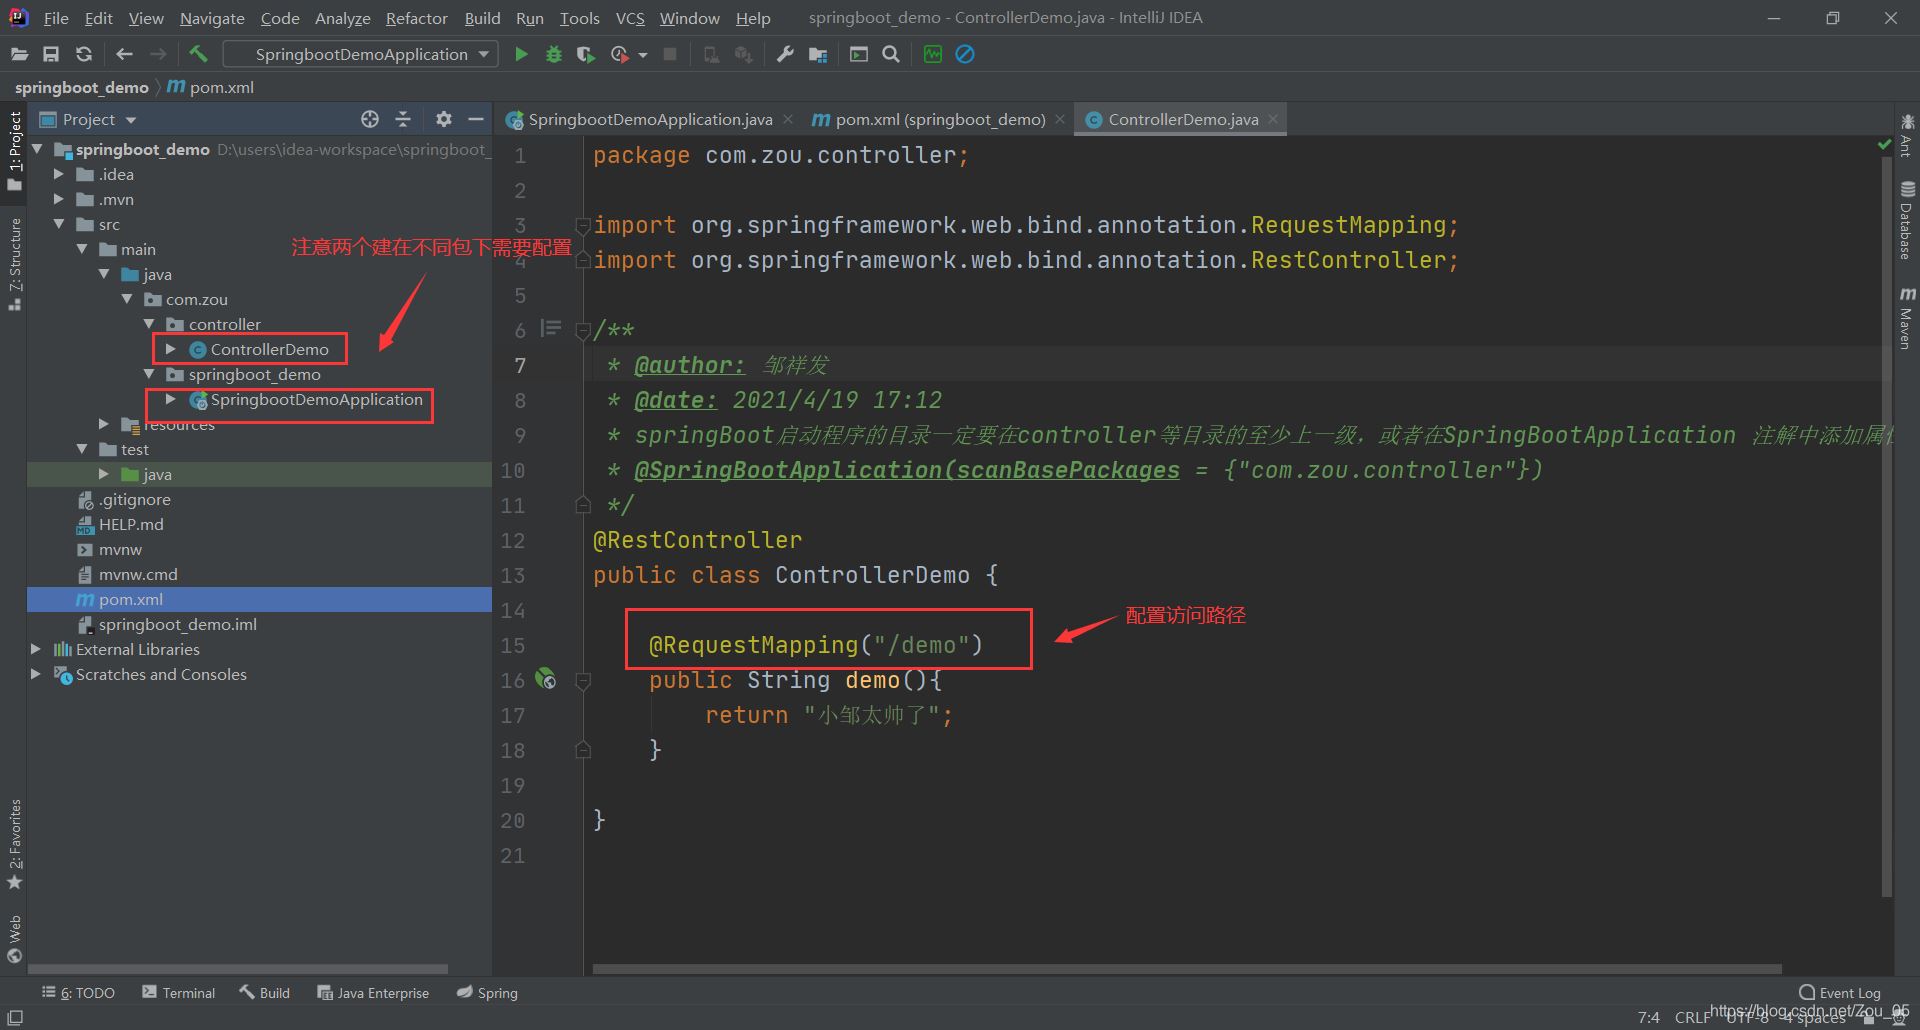
ControllerDemo的代碼如下
package com.zou.controller;import org.springframework.web.bind.annotation.RequestMapping;import org.springframework.web.bind.annotation.RestController;/** * @author: 鄒祥發(fā) * @date: 2021/4/19 17:12 * springBoot啟動程序的目錄一定要在controller等目錄的至少上一級,或者在SpringBootApplication 注解中添加屬性: * @SpringBootApplication(scanBasePackages = {'com.zou.controller'}) */@RestControllerpublic class ControllerDemo { @RequestMapping('/demo') public String demo(){return '小鄒太帥了'; }}
注:springBoot啟動程序的目錄一定要在controller等目錄的至少上一級,或者在SpringBootApplication 注解中添加屬性:

@SpringBootApplication(scanBasePackages = {'com.zou.controller'})
(3)在application.properties中修改端口號
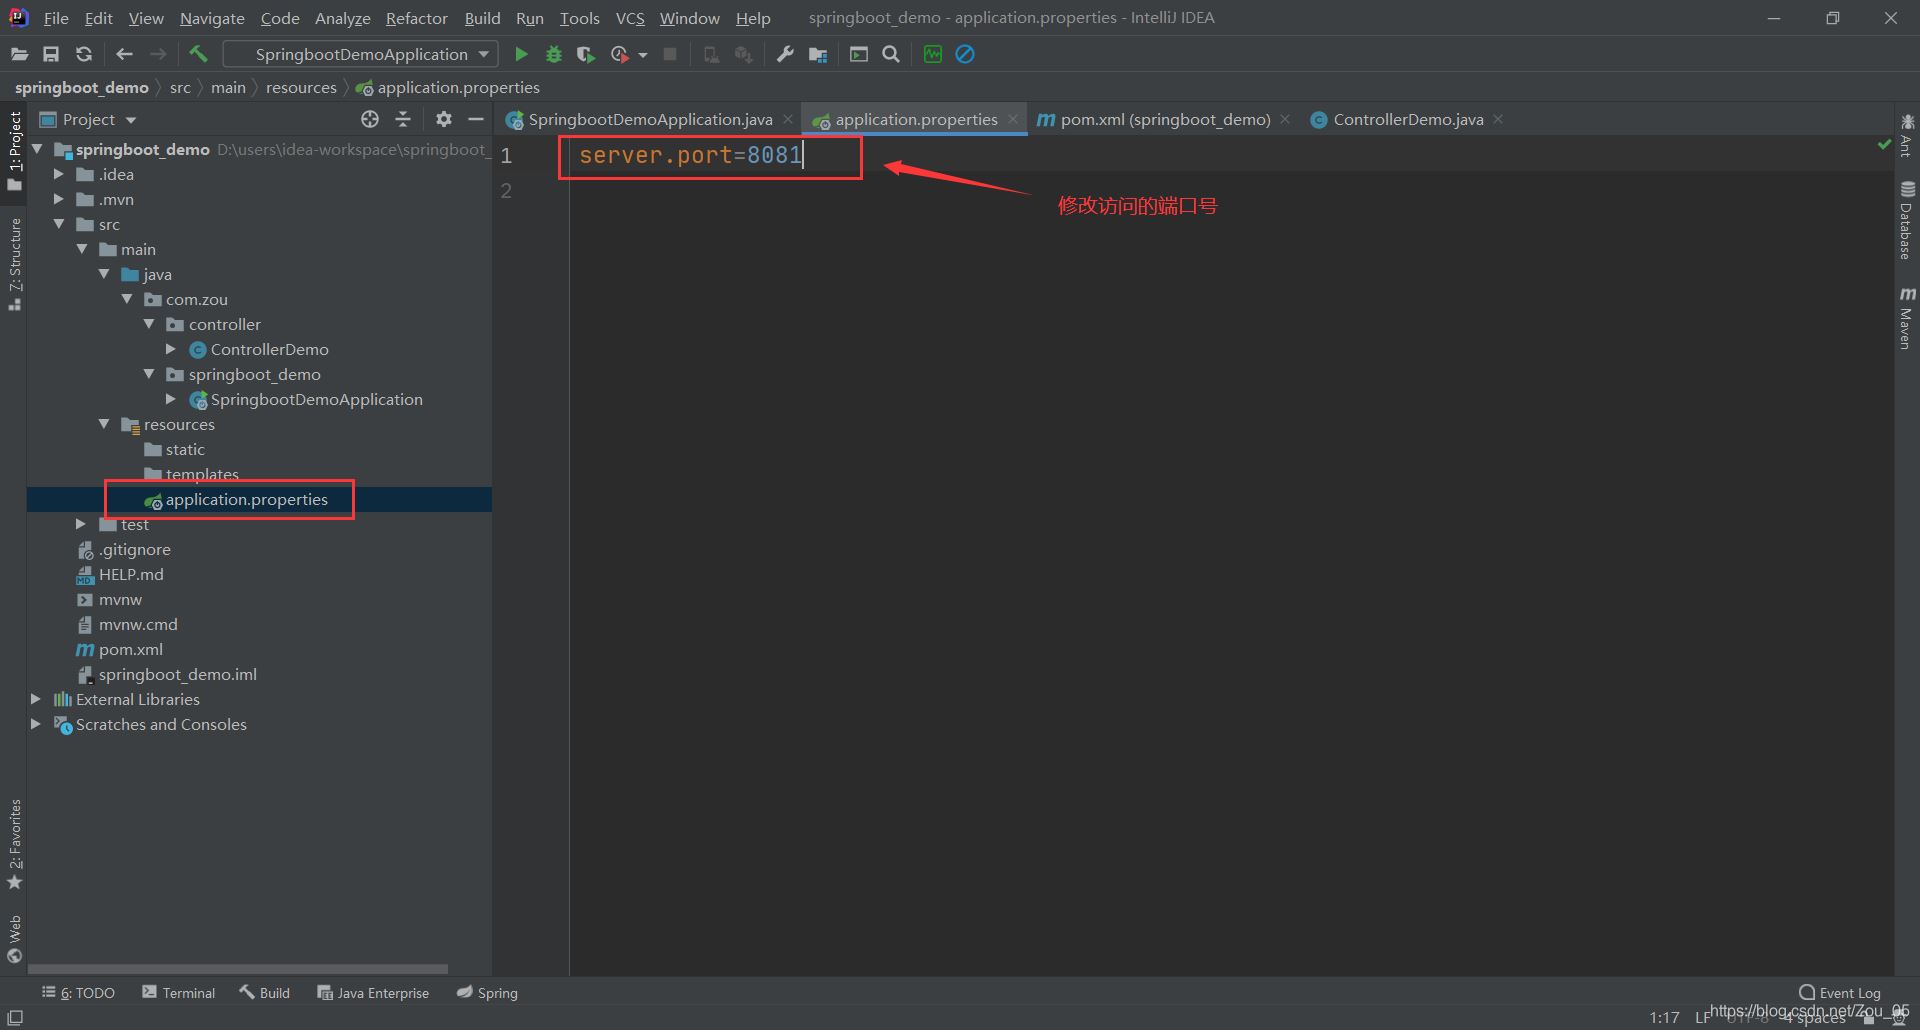
server.port=8081
(4)測試
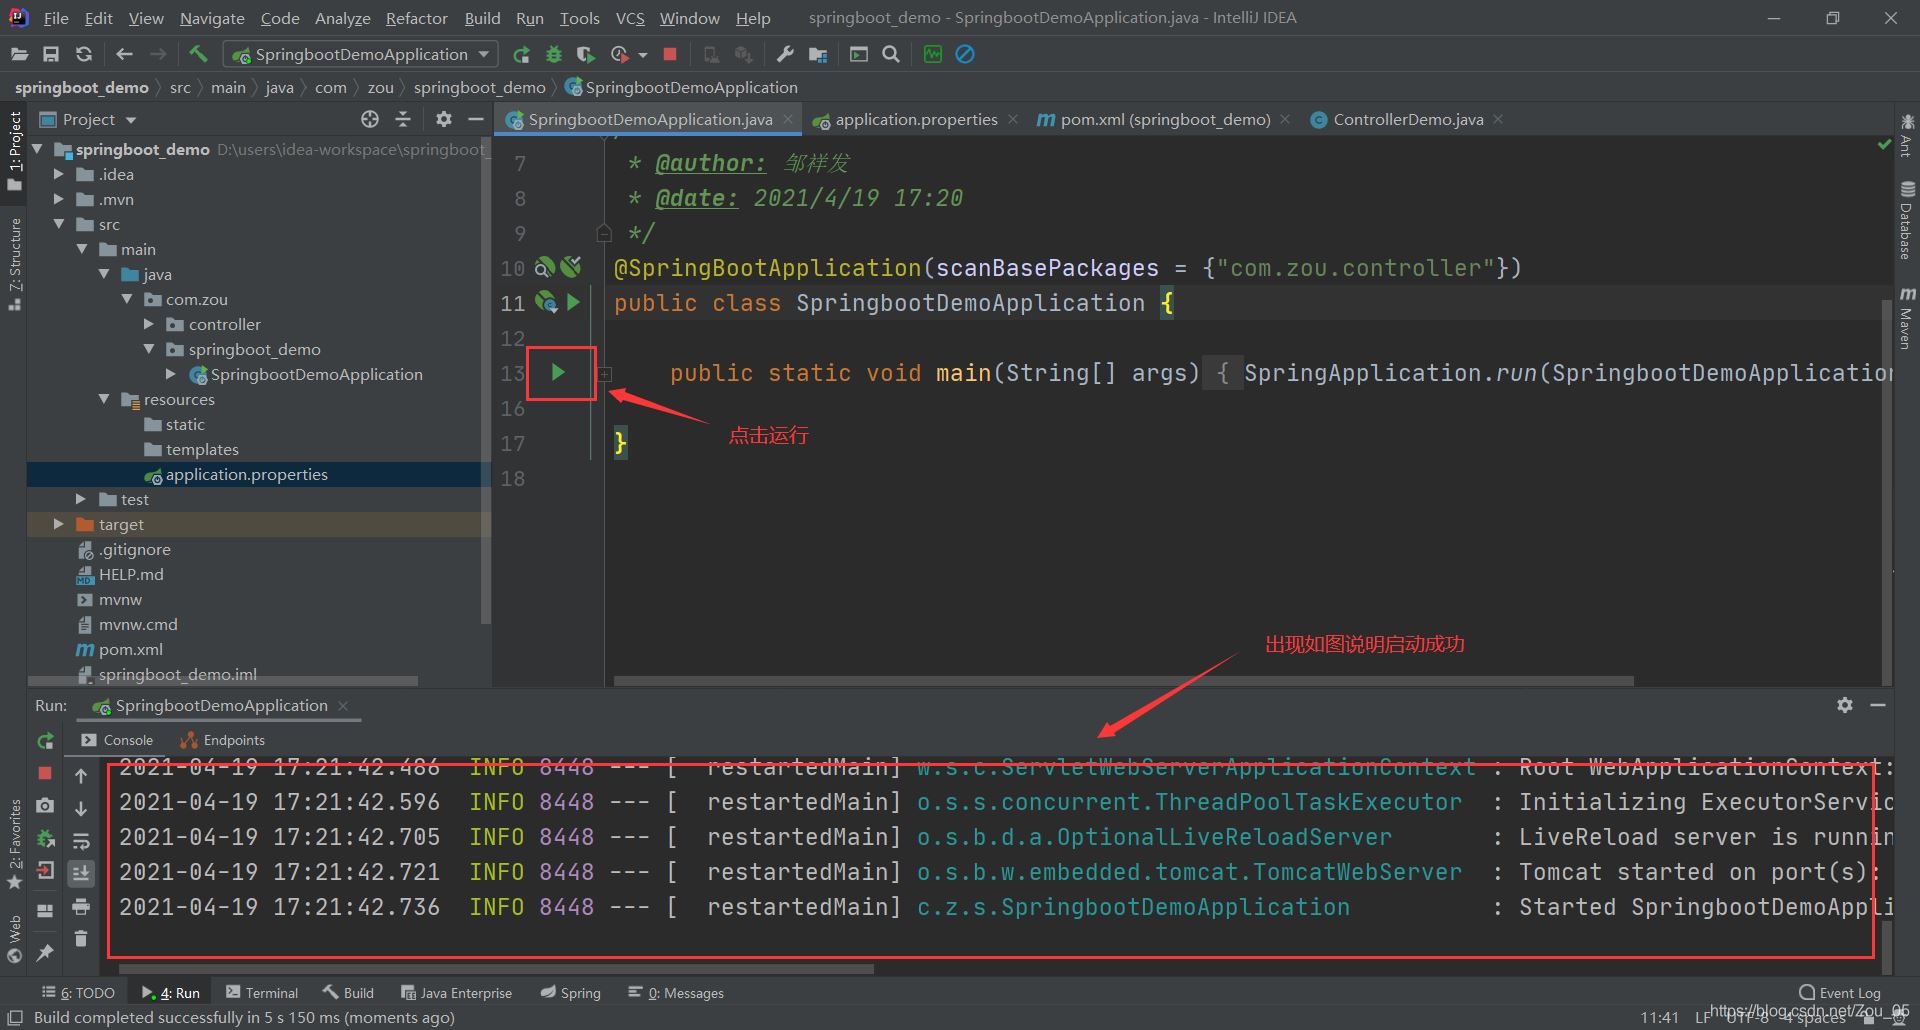
(5)打開瀏覽器,訪問http://localhost:8081/demo,因為在之前的ControllerDemo里面配置的訪問路徑為/demo
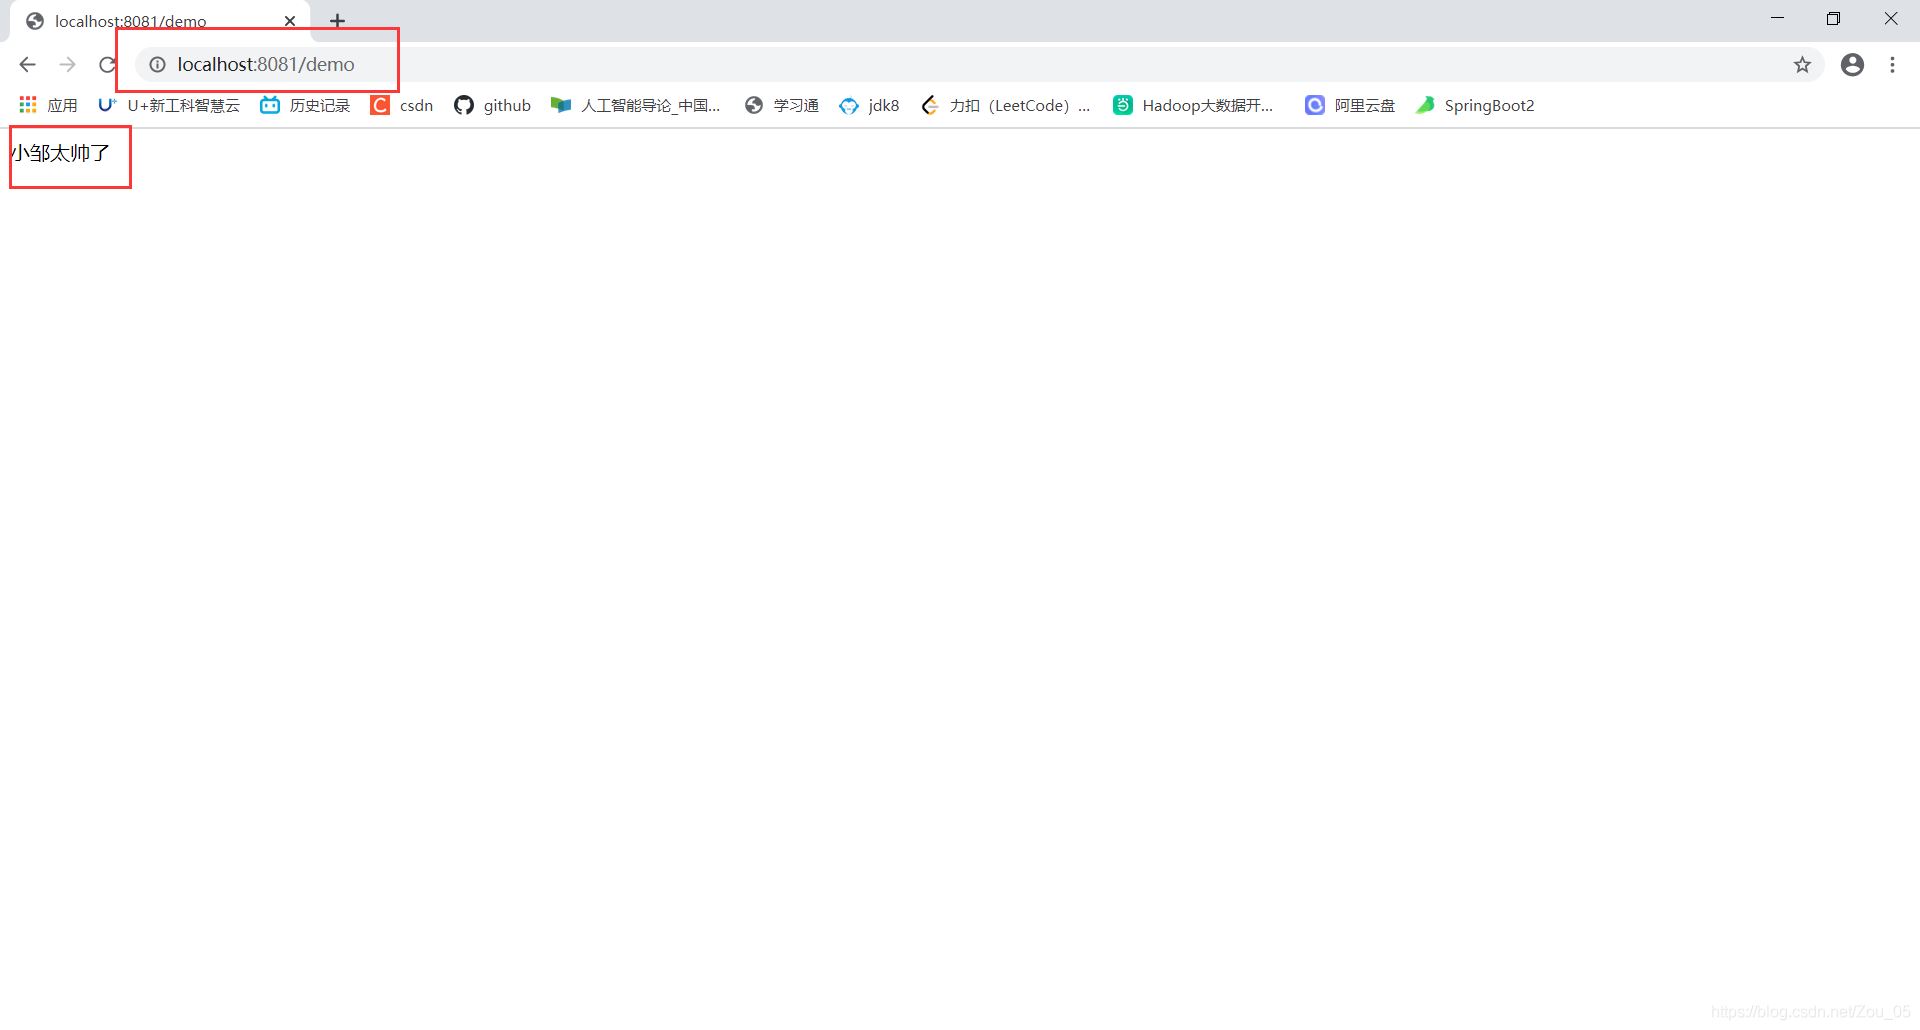
(6)到這里第一個springboot開發(fā)web的入門程序就完成了。
到此這篇關(guān)于使用springboot開發(fā)的第一個web入門程序的實現(xiàn)的文章就介紹到這了,更多相關(guān)springboot web入門 內(nèi)容請搜索好吧啦網(wǎng)以前的文章或繼續(xù)瀏覽下面的相關(guān)文章希望大家以后多多支持好吧啦網(wǎng)!
相關(guān)文章:
1. XML入門精解之結(jié)構(gòu)與語法2. CSS Hack大全-教你如何區(qū)分出IE6-IE10、FireFox、Chrome、Opera3. CSS3實例分享之多重背景的實現(xiàn)(Multiple backgrounds)4. 利用CSS3新特性創(chuàng)建透明邊框三角5. XML入門的常見問題(一)6. HTML5 Canvas繪制圖形從入門到精通7. 概述IE和SQL2k開發(fā)一個XML聊天程序8. HTML <!DOCTYPE> 標簽9. HTML DOM setInterval和clearInterval方法案例詳解10. XML入門的常見問題(二)

 網(wǎng)公網(wǎng)安備